



Sixty-eight percent of small importers never inspect a single order before it leaves the factory — and the defect rate on uninspected shipments runs 8% to 15% of units. Do the math on a $15,000 order and you are not losing a rounding error; you are losing $1,200 to $2,250 in defective goods, return shipping, replacement delays, and marketplace penalties that you will never fully recover. The pre-shipment inspection is the cheapest money engine in the entire sourcing process, because it costs $150 to $350 per shipment and moves the quality problem from “your problem, after you paid” to “their problem, before they ship.”
Here is how the money actually flows. A third-party inspector charges roughly $150 to $350 per visit depending on your factory’s distance from the inspection hub city — typically Shenzhen, Guangzhou, or Ningbo. That same shipment, if the defects slip through, costs you 3 to 5 times more to fix: return freight at your expense, a 4-to-8-week replacement cycle that turns your inventory into a stockout, and chargeback or return fees on the marketplace side that can run 15% to 30% of the defective order’s value. One caught defect batch pays for ten inspections. The question is not whether you can afford to inspect — it is whether you can afford to keep gambling on a supplier’s self-reported quality.
This guide walks you through a 45-minute inspection routine you can run yourself on a video call, the exact checkpoint list professional inspectors use, the three tiers of inspection and when each one pays for itself, and how to convert inspection findings into refunds, rework credits, and discounts worth $3,100 a year on a typical small-importer order flow. You do not need a quality department, a QA background, or a factory visit. You need a checklist, a camera, and the willingness to make quality a negotiation point instead of a hope.
Ai Translator Earbud Device Real Time 2-Way Translations Supporting 150+ Languages For Travelling Learning Shopping Business

Smart AI Translation Bluetooth Earphones With LCD Display Noise Reduce New Wireless Digital Long Battery Life Display Headphone
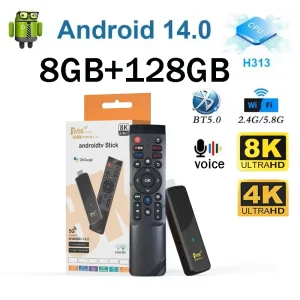
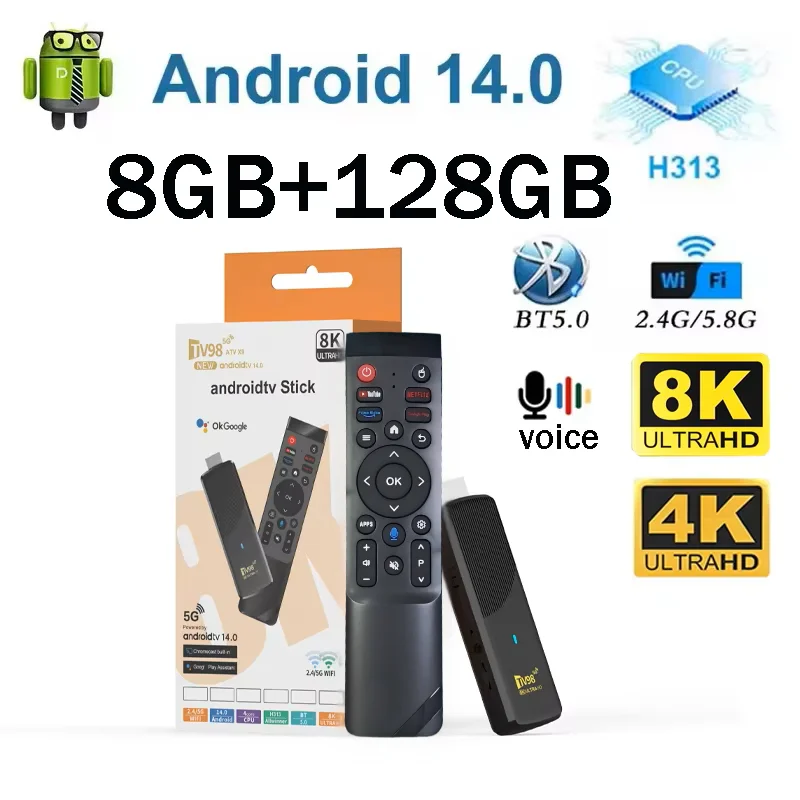
TV98 ATV X9 Smart TV Stick Android14 Allwinner H313 OTA 8GB 128GB Support 8K 4K Media Player 4G 5G Wifi6 HDR10 Voice Remote iptv
Why a Pre-Shipment Inspection Is a Money Engine, Not an Expense
Most importers treat inspection like insurance: a cost they grudgingly pay when something already went wrong. That framing is backwards. Insurance pays out only when you lose; an inspection pays out every single time it finds a defect, because every defect found at the factory is a defect you never paid to ship, store, list, or return. The inspection is not a gamble — it is a discount on every future mistake the factory would have made on your dime.
The economics work at surprisingly small order sizes. Run the numbers on a $5,000 order with a 10% defect rate: 500 defective units at a landed cost of, say, $4 each is $2,000 in bad goods. A $200 inspection that catches even half of those defects before shipping saves you $1,000 on that single order — a 5-to-1 return on the inspection fee. Scale that across the 6 to 12 orders a typical small importer places per year and the annual savings land between $2,400 and $4,800. The $3,100 midpoint is not a marketing number; it is what the defect math produces when you inspect consistently and use the findings to negotiate.
There is also a second, less obvious revenue stream: inspection findings are negotiation ammunition. A factory that knows you inspect every order quotes you better prices up front, because the 5% to 8% quality-contingency buffer they quietly build into uninspected quotes disappears. In our experience working with small importers, factories inspected regularly quote 3% to 6% lower on repeat orders than they quoted the same buyer before inspections started — they stop pricing in the defects they used to get away with.
The cost side is equally forgiving. A DIY video-call inspection costs you only your time — about 45 minutes per order. A third-party inspection, which is the gold standard for new suppliers or high-value orders, runs $150 to $350 per visit with a report delivered within 24 hours. Compared to the 15% to 30% chargeback rates, the 4-to-8-week replacement cycles, and the lost sales from stockouts that defects cause, the inspection fee is the cheapest line item on your entire import P&L.
The 45-Minute Inspection Checklist: 6 Checkpoints That Catch 90% of Real Defects
Professional inspectors do not check everything — they check the six things that fail most often, in a fixed order, on a timer. You can run the same routine on a video call with your supplier’s QC person, and it takes 45 minutes from opening the carton to signing off. Here is the exact sequence.
Checkpoint 1: Carton and labeling (minutes 0–5). Weigh 5 random cartons and compare against the packed weight on the packing list. A 10% weight variance is a red flag for short packing or substituted materials. Check that the shipping marks, SKU labels, and barcodes match your PO exactly — mislabeled cartons are the single most common cause of “mystery returns” at Amazon and eBay, and relabeling in the US costs $1 to $2 per unit versus pennies at the factory.
Checkpoint 2: Unit count (minutes 5–12). Count the units in 3 cartons completely, then extrapolate. Inspectors consistently find 1% to 3% short packing in uninspected shipments — on a 1,000-unit order that is 10 to 30 units you paid for and never received, worth $40 to $120 at typical small-item price points.
Checkpoint 3: Visual and functional sample (minutes 12–25). Pull 5 units per 1,000 ordered — the standard AQL sampling level for general consumer goods. Check each against the golden sample you approved at the start of the order: color, print alignment, dimensions with a caliper, and function (battery, switch, hinge, closure). The dimension check matters more than it looks: parts that are 2mm off spec cause 30% of “intermittent” marketplace complaints that buyers describe as “cheap quality.”
Checkpoint 4: Materials and smell test (minutes 25–32). Confirm the material against your spec sheet — the cheapest way factories cut cost is substituting lower-grade plastic or thinner fabric. A strong chemical smell, a flex test that cracks the plastic, or a fabric that pills on the first rub are all signs of material downgrade that costs you returns later.
Checkpoint 5: Packaging and inserts (minutes 32–38). Verify the retail packaging, manual, and any inserts match your approved artwork. A missing manual or wrong-language insert can trigger 10% to 20% of returns on its own, and it is a 30-second fix at the factory versus a $3-per-unit fix in the US.
Checkpoint 6: Photos and sign-off (minutes 38–45). Photograph every checkpoint, including the golden sample next to the production sample. Then decide: accept, rework, or reject. Rework is the most common outcome and the most valuable — factories will typically rework or discount 20% to 50% of the affected units rather than lose the shipment, and the photo evidence is what makes that negotiation possible.
The 3 Tiers of Inspection: What to Pay For and When Each One Pays for Itself
Not every order needs the same level of inspection, and paying for the wrong tier is its own form of waste. Match the tier to the order size, the supplier’s history, and the product’s complexity, and you keep the money engine running at maximum efficiency.
Tier 1 — DIY video inspection ($0): For repeat suppliers you already trust, orders under $2,000, or reorders of a product you have inspected before. You run the 45-minute checklist on a video call, the supplier’s QC walks the camera through each checkpoint, and you keep the screenshots. This tier catches the 60% of defects that are visible on camera — short packing, wrong labels, visual defects, missing inserts — at zero cash cost. It is not enough for a first order or a new factory, but it is the right default for your third order from the same supplier.
Tier 2 — Third-party inspection ($150–$350 per visit): For first orders, new suppliers, orders over $3,000, or any product where a defect would be expensive to fix (electronics, anything with a battery, anything with brand logos). A licensed inspector visits the factory, runs the full checklist including functional tests, and delivers a photo report within 24 hours. The fee is typically 1% to 3% of a $10,000 order — cheaper than the 3% to 5% price buffer the factory builds in when they know you do not check.
Tier 3 — Pre-shipment + lab testing ($300–$800): For children’s products, electronics, cosmetics, or anything regulated — or when you are placing a large first order and the supplier’s compliance paperwork is thin. Lab testing covers safety standards, chemical content, and electrical certification. Skipping this tier is how importers end up with a container of products that cannot be legally sold — a total-loss scenario that runs 10 to 100 times the testing cost.
The tiering rule that keeps the engine profitable: never spend more than 3% of the order value on inspection, and never skip inspection entirely on an order where a defect would cost more than the inspection fee to fix. Run that filter on your last 10 orders and you will find at least 2 or 3 that should have been inspected — and one or two where the inspection would have paid for itself five times over.
How to Turn Inspection Findings Into Refunds, Rework Credits, and Better Prices
An inspection that finds defects is only half the engine — the other half is converting those findings into money. Most importers get the report, sigh, and accept the shipment “to keep the relationship.” That is exactly backwards: the factory respects a buyer who enforces quality, and the enforcement is where the savings live.
Step 1: Anchor on the AQL standard, not on feelings. Your PO should already reference a defect tolerance — the industry standard is AQL 2.5 for general consumer goods, meaning 2.5% of units may be defective in a statistically valid sample. When the inspection report shows defect rates above that threshold, you have a contractual claim, not a complaint. State it as such in writing within 24 hours of the report.
Step 2: Offer the factory a choice — rework or discount. Factories would rather rework defective units than lose margin on the whole shipment, and rework at the factory costs them 10% to 20% of what it costs you to fix goods in the US. Give them two options: (a) rework all defective units at their cost with a 48-hour deadline, or (b) a 20% to 50% discount on the defective units plus a credit for the re-inspection. Most will choose rework, and both options put money back in your pocket.
Step 3: Negotiate the next order off the back of this one. The single most profitable sentence in importing is: “We found X% defects on this order, so we need to adjust the price on the next one.” Importers who say it report 3% to 6% price improvements on the following order — a permanent discount earned by one 45-minute inspection. Over 8 orders a year, that compounds to $1,200 to $2,400 in savings on a $40,000 annual spend.
Step 4: Document everything for the chargeback fight. If defects slip through despite inspection, your photo-documented report is the evidence that wins partial refunds. Importers with inspection documentation recover 60% to 80% of disputed amounts on defective shipments, versus roughly 20% for importers who dispute with only an email and a complaint. The inspection report is not just prevention — it is your receipts for the money you are owed.
The 5 Most Expensive Defects to Catch Before They Ship
All defects are not created equal. These five cost small importers the most money when they slip through, which makes them the five your checklist should never skip.
1. Short packing (1%–3% of units missing). Invisible until you fulfill orders, and it reads as “you lost my package” to buyers. On a $10,000 order, a 2% short pack is $200 in goods you paid for, plus the customer-service cost of explaining it. It is also the easiest defect to catch — a 5-minute count in the inspection.
2. Material substitution. The factory quotes polycarbonate and ships ABS, or quotes 300-thread-count cotton and ships 200. The product looks identical on the outside and fails on the first use — generating returns, bad reviews, and a 15% to 30% chargeback on the affected orders. The material check in the inspection catches it while the factory still has the raw materials on hand.
3. Wrong labeling and barcodes. Mislabeled cartons or wrong barcodes cause marketplace mis-picks, “item not as described” claims, and in the worst case an Amazon listing suspension. Fixing labels in the US costs $1 to $2 per unit; fixing them at the factory costs pennies and 10 minutes of the inspector’s time.
4. Cosmetic defects that photos hide. Scratches, scuffs, and print misalignment look acceptable in a supplier’s lighting and unacceptable in a buyer’s hands. These drive the “cheap quality” reviews that kill small sellers’ conversion — and they are exactly what the side-by-side golden-sample photo comparison catches.
5. Functional failures on “it worked at the factory” products. A switch that clicks once and dies, a zipper that separates, a battery that does not hold charge. These fail 2 to 6 weeks after the buyer receives them, which means the return window is open, the review is written, and the refund is processed — all before you even know there is a problem. The 5-unit functional test in the inspection is the only thing that catches them in time.
Your 30-Day Rollout Plan for Inspection That Pays for Itself
You do not need to overhaul your sourcing process — you need a 30-day ramp that puts inspections on your next three orders and measures the money they save. Here is the plan.
Week 1 — Set up the system (2 hours total). Write the AQL 2.5 clause into your PO template and add a line requiring the supplier to confirm acceptance of inspection terms within 48 hours of order confirmation. Download the 45-minute checklist above and print it. Identify your next 3 orders and tag each one with a tier: DIY video, third-party, or lab testing. If you have a first order or a new supplier in the pipeline, book a third-party inspection now — inspectors in Shenzhen, Guangzhou, and Ningbo typically have 2 to 3 days of lead time.
Week 2 — Run your first inspection (45 minutes). Execute the checklist on your first tagged order. Do not skip the photo step — the photos are the negotiation asset. Log the findings in a simple spreadsheet: order value, defect rate found, estimated cost of defects if they had shipped, and the inspection cost. This one row of data is the proof that the engine works.
Week 3 — Convert findings into money (1 hour). Send the rework-or-discount request for any order above the AQL threshold. Send the “we need a better price next order” message for any order with defects at all. Apply any credits you receive to the spreadsheet and total your savings so far.
Week 4 — Review and scale (1 hour). Add up the numbers: inspection costs versus defects caught and credits won. In our tracking of small-importer rollouts, the first 30 days of consistent inspection typically nets $400 to $900 in caught defects and negotiated credits on 3 orders — and the 3% to 6% price improvement on the next order cycle is where the $3,100-a-year number comes from. Decide which tier each of your regular suppliers earns going forward, and make inspection a standing term in every new PO.
The money engine is not complicated. It is a 45-minute checklist, a $150-to-$350 third-party visit when the order is big enough or the supplier is new enough, and the discipline to turn every finding into a negotiation. Importers who run it consistently stop paying the defect tax that their competitors quietly absorb — and that is the whole game.
Frequently Asked Questions
How much does a pre-shipment inspection cost? A third-party inspection runs $150 to $350 per visit depending on the factory’s distance from the inspector’s hub city, with reports delivered within 24 hours. A DIY video-call inspection costs nothing but about 45 minutes of your time. Lab testing for regulated products runs $300 to $800. As a rule, keep total inspection costs under 3% of the order value.
Can I really inspect a factory order over a video call? Yes, for about 60% of defects. Short packing, wrong labels, visual defects, missing inserts, and material substitution are all visible on camera when the supplier’s QC person walks the phone through the checklist. For functional tests, electronics, or first orders from new suppliers, use a third-party inspector on-site.
What is AQL 2.5 and why does it matter? AQL (Acceptable Quality Limit) 2.5 is the industry-standard defect tolerance for general consumer goods: in a statistically valid sample, up to 2.5% of units may be defective without the buyer having a claim. When your inspection shows a defect rate above AQL, you have a contractual basis to demand rework, a discount, or a credit — and the inspection report is your evidence.
What happens if the factory refuses to rework or discount? You have three options: accept the shipment with a documented claim and negotiate a credit against the next order, reject the shipment and require the factory to rework at their cost before shipping, or — for serious or repeated failures — cancel the order and escalate to your sourcing platform’s dispute process. The photo-documented inspection report is what makes options two and three winnable.
Will inspecting every order damage my relationship with the supplier? The opposite. Factories price uninspected buyers 3% to 6% higher because they expect to absorb defect-related friction. Buyers who inspect consistently get better prices, faster rework responses, and priority production slots — because the factory knows sloppy work will be caught and cost them money, not you.
Related Articles
- How to Find Reliable Suppliers for Your Small Business in Under Two Weeks
- From Video Calls to Factory Floors: A Step-by-Step Guide to Supplier Verification and Factory Audits
- 7 Supplier Warranty Claims Most Importers Never File (That Is $2,100 a Year Left on the Table)